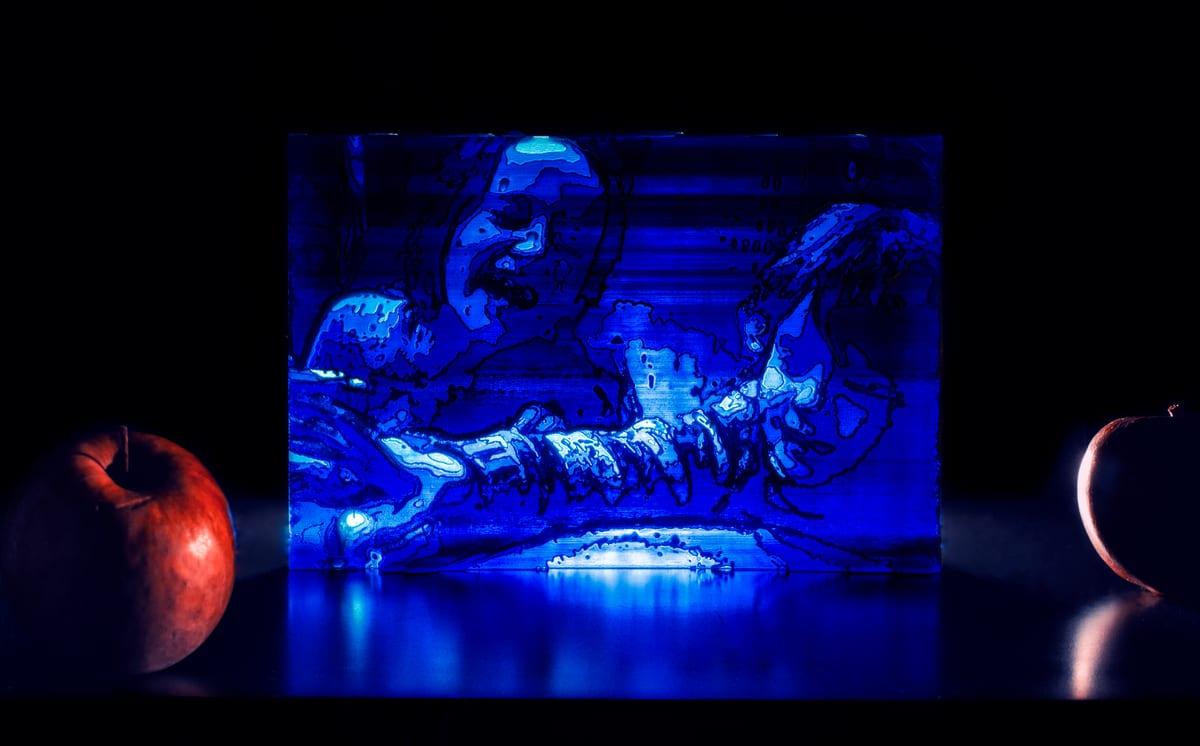
Turn a Photo into a 3D Printed Lithophane
A lithophane is a photograph stored as thickness. Bright parts of the image become a thin panel that lets light through, dark parts become a thick one that blocks it, and the whole thing looks like a blank white rectangle until you put a light behind it. Then a face appears. It is the single most reliable "how did you do that" gift in 3D printing.
It is also easy to get wrong, because the failure modes are quiet. The print succeeds, the part looks fine, and the image is muddy grey. Here are the settings that matter, the photos that work, and what it costs to have one made if you do not own a printer.
How do you turn a photo into a 3D printed lithophane?
Run the photo through a free lithophane generator, which converts image brightness into panel thickness: bright areas become 0.8mm, dark areas 3.0mm. Print it upright in white PLA at 0.1mm layers with 100% infill. A 100 × 150mm panel uses about 35g and 8 hours, then needs a backlight before the image appears at all.
Last verified: August 2026
Key takeaways
- •A lithophane encodes a photo as thickness. The standard range is 0.8mm for the brightest areas and 3.0-3.6mm for the darkest.
- •Print it standing upright at 0.1mm layer height with 100% infill. Any infill pattern below 100% shows as a visible grid once the panel is lit.
- •A 100x150mm flat lithophane is roughly 35g of PLA and 8 hours of print time, which is $0.67-1.05 of filament at $19-30/kg.
- •Commissioned prices as of August 2026: $20-45 for a flat panel with a stand, $60-150 for a four-panel LED lamp.
- •A 100mm wide panel printed with a 0.4mm nozzle has only about 250 horizontal extrusion lines, so contrast and framing in the source photo matter far more than megapixels.
How a Lithophane Actually Works
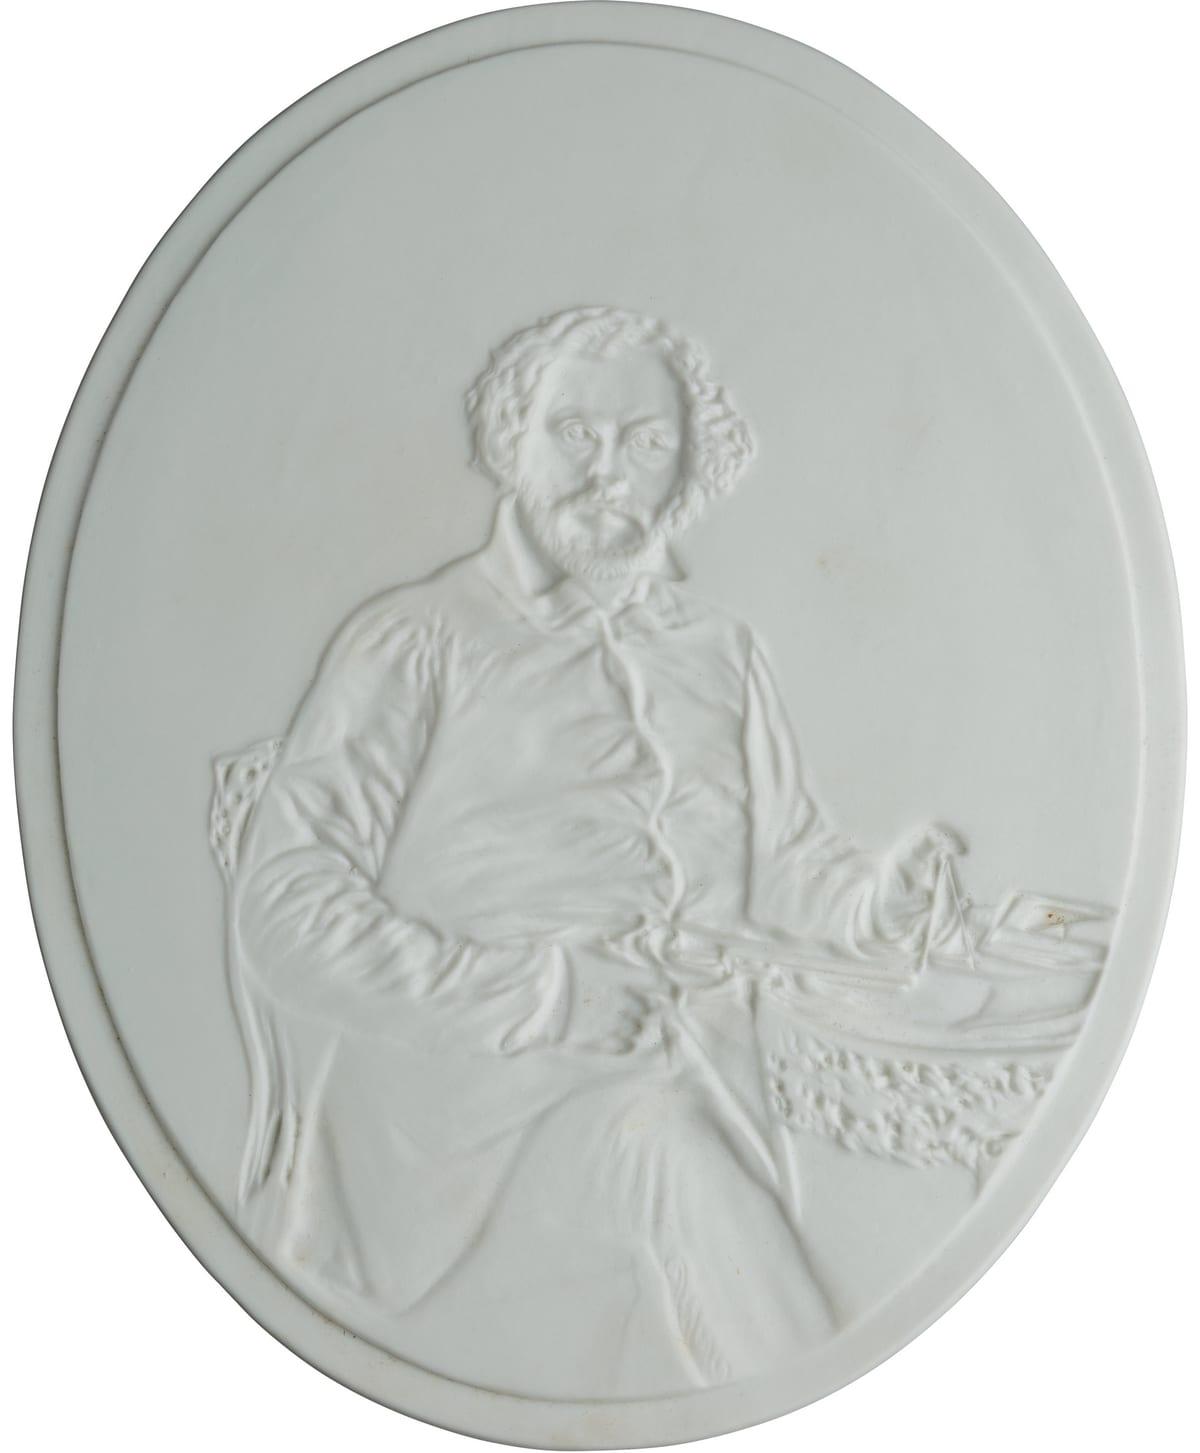
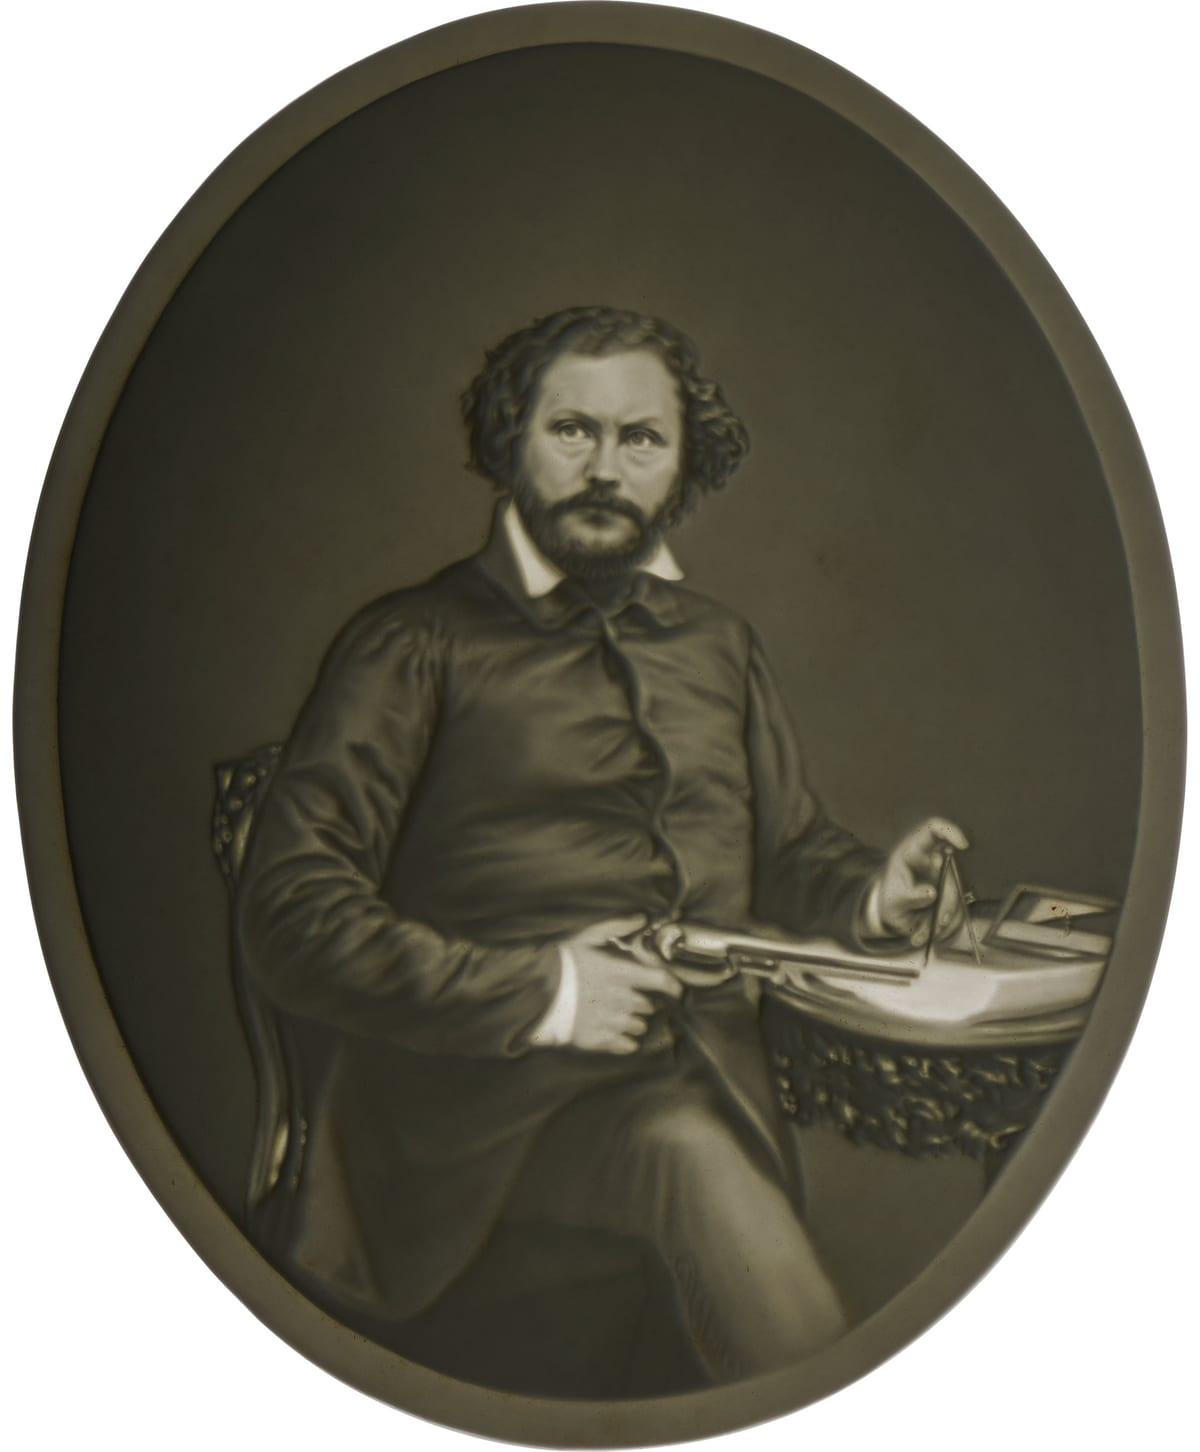
The technique is not new. Lithophanes were patented in France in 1827 and produced in translucent porcelain throughout the 19th century, usually as plaques for windows and lamp screens. The physics has not changed: light transmitted through a translucent material falls off as the material gets thicker, so a relief carved in reverse reads as a greyscale image when lit from behind.
3D printing just made it cheap. Instead of casting porcelain, a generator maps each pixel's brightness to a Z height and hands you an STL. White PLA turns out to be an excellent substitute for thin porcelain, because it is translucent at small thicknesses and opaque by about 4mm.
The corollary catches people out constantly. Under normal room light, reflecting off the front surface, a lithophane looks like a faintly textured white slab. That is not a failed print. It is the whole point.
Choosing a Photo That Will Actually Work
Photo choice decides whether a lithophane is impressive or a grey smudge, and it is the one decision the software cannot make for you. Four rules cover almost everything:
- Contrast beats resolution. The panel has a fixed tonal range between 0.8mm and 3.0mm. A flat, hazy photo uses a fraction of it. A punchy photo with real blacks and real whites uses all of it.
- Kill the dark background. A subject against a dark room becomes a subject against a 3mm solid slab, which blocks nearly all light and makes the whole panel read as a black rectangle with a face floating in it. Crop tight or replace the background with white before you generate.
- Front-lit faces only. Harsh side lighting puts deep shadows across half a face, and those shadows become maximum-thickness plastic. Flat, even light looks boring in a photo and excellent in a lithophane.
- Assume small details disappear. Anything under about 0.5mm on the finished panel is gone. Spectacle frames, earrings, individual strands of hair and printed text on a shirt all fall below that on a 100mm portrait.
One useful bit of arithmetic: a 100mm wide panel printed with a 0.4mm nozzle has about 250 horizontal extrusion lines across it. That is your real horizontal resolution. Generators resample whatever you give them down onto that grid, so a 24-megapixel source file is not helping and a modest one is not holding you back. Contrast and framing are what decide the result.
The Settings That Matter
Free browser-based generators such as the 3dp.rocks Lithophane Maker and ItsLitho will produce the STL from your image and let you pick the shape, thickness range and size. The slicer settings below are where quality is won or lost.
| Setting | Value | Why |
|---|---|---|
| Orientation | Standing upright, image face vertical | No supports, no bed texture printed into the image, and layer lines run horizontally where they blend into the picture rather than across it. |
| Layer height | 0.1mm (0.08mm for small panels) | Printed upright, layer height is your vertical resolution. 0.2mm halves the detail and roughly halves the print time. |
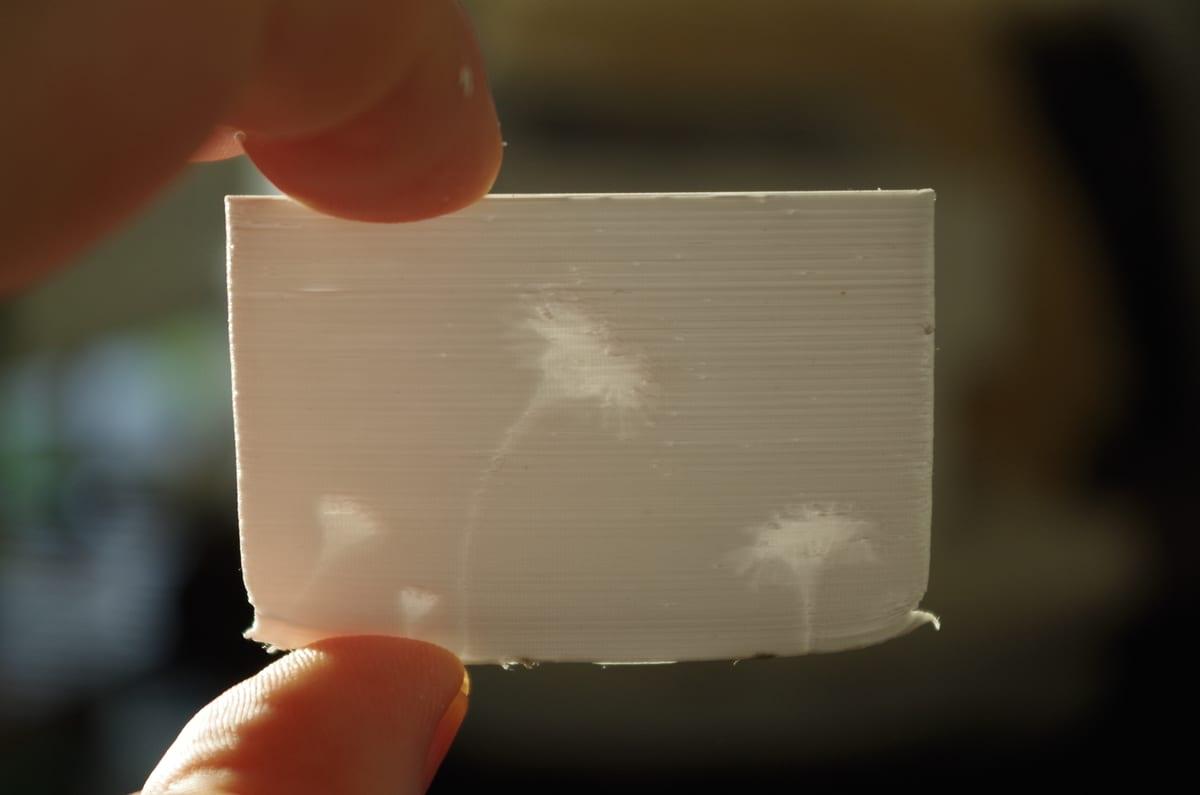
| Infill | 100% | Anything less prints a lattice inside the panel, and that lattice is plainly visible as a grid once you backlight it. |
| Thickness range | 0.8mm minimum, 3.0–3.6mm maximum | Below 0.8mm the panel gets fragile and translucent enough to look washed out. Past about 4mm PLA transmits almost nothing, so extra thickness buys no extra black. |
| Filament | White or natural PLA | Colour tints the entire image. Silk and marble filaments add streaks that read as artefacts. Matte white is the safest choice. |
| Outer wall speed | 30–40mm/s | Ringing from fast direction changes is invisible on a normal print and obvious on a backlit one, showing as ghost echoes beside high-contrast edges. |
| Bed adhesion | Brim, 5mm or more | A tall panel with a 3mm footprint is the classic tipping and corner-lift geometry. A brim costs a gram and saves an eight-hour print. |
Material and print time by lithophane size
A 100x150mm flat lithophane uses about 35g of PLA and 8 hours of print time at 0.1mm layers with 100% infill. Doubling the panel area roughly doubles both.
| size | PLA used (g) | Print time (hours) |
|---|---|---|
| 60 x 90mm | 13 | 3 |
| 100 x 150mm | 35 | 8 |
| 150 x 200mm | 71 | 17 |
| Lamp, 4 panels | 110 | 26 |
Source: Sliced estimates at 0.1mm layer height, 100% infill, 0.4mm nozzle, 0.8-3.0mm thickness range and 35mm/s, with PLA at 1.24 g/cm3. Figures are estimates and will vary with image content. August 2026.
Flat Panel, Lamp, or Lightbox?
The format decides how often the thing actually gets looked at, which for a gift matters more than print quality. A flat panel on a stand needs a window or a lamp behind it and usually ends up in a drawer. A lamp is self-lit, so it works at night on a bedside table and gets used.
Flat panel with a printed stand. Cheapest and fastest. Best where there is a bright window it can sit against.
Framed LED lightbox. A shallow box with an LED strip and a diffuser behind the panel. Even illumination, works anywhere, and roughly doubles the build.
Curved or cylindrical lamp. The generator wraps the image around an arc or a cylinder that sits over a small LED base. A curve also stiffens a thin panel, so these warp less than flat ones.
Four-panel lamp. Four photos forming a box around a light. The most impressive version and the longest print, at around 26 hours for a set.
Whatever the format, the backlight has to be diffuse. A single bare LED 20mm behind a panel produces a bright hotspot in the middle and dark corners, which ruins the image far more effectively than any slicer setting. Use an LED panel, or a strip behind a piece of frosted acrylic. Warm white around 2700–3000K flatters skin tones; cool white makes portraits look clinical.
Typical commissioned lithophane prices
A flat lithophane panel with a stand costs $20-45 commissioned from an independent maker; a four-photo LED lamp runs $60-150. The spread is print hours and assembly, not material.
| type | Typical low | Typical high |
|---|---|---|
| Flat panel + stand | $20 | $45 |
| Framed LED lightbox | $35 | $80 |
| Curved lamp shade | $45 | $110 |
| Four-photo lamp | $60 | $150 |
Source: 3D Print Bounty maker quotes and comparable independent commissions, August 2026. Ranges rather than fixed prices because size, format and whether electronics are included all move the figure.
Why Lithophanes Go Wrong
It looks blank. It is not backlit. Hold it against a window before concluding anything else.
It looks flat and grey. Either the source photo had no contrast, or the maximum thickness was set too low. Push maximum thickness to 3.4–3.6mm and start from a punchier image.
A visible grid across the image. Infill was below 100%. There is no fix in post; it has to be reprinted.
Horizontal bands at regular intervals. Z-axis wobble or inconsistent extrusion. Slowing down helps; a well-maintained machine helps more, which is a fair argument for handing the job to someone whose printer is dialled in.
Corners lifted off the bed. A thin tall panel with a small footprint. Brim, no draught, and PLA rather than PETG. PETG is a worse lithophane material anyway: it is glossier, more prone to stringing across the panel face, and gives less pleasant diffusion. Our PLA vs PETG comparison covers where each one belongs.
Do not sand or paint it. Both change the thickness, and thickness is the image. A lithophane is one of the very few prints where the raw surface is the finished surface.
A note on photo rights
If the photo came from a professional portrait session, a school photographer or a stock library, the photographer usually holds the copyright even though you are in the picture. We ask requesters to confirm they hold the right to reproduce an image before a maker prints it. Your own phone photos are the simplest answer, and they are usually better source material anyway because you can reshoot with even lighting.
Frequently asked questions
How do you turn a photo into a 3D printed lithophane?
Run the photo through a lithophane generator, which converts brightness into thickness: bright pixels become a thin 0.8mm panel, dark pixels a thick 3.0mm one. Export the STL, print it standing upright in white PLA at 0.1mm layer height with 100% infill, then backlight it. Nothing appears until light passes through it.
What settings should I use to print a lithophane?
Layer height 0.1mm, 100% infill, printed vertically so no supports are needed and the image face never touches the bed. Minimum thickness 0.8mm, maximum 3.0-3.6mm. Use white or natural PLA and slow the outer wall to about 30-40mm/s, because ringing artefacts are clearly visible once the panel is backlit.
Which photos make good lithophanes?
High-contrast photos with the subject filling the frame and an even, light background. Dark backgrounds print as a solid maximum-thickness slab and swallow the subject. Fine details such as spectacle frames and individual strands of hair vanish below roughly 0.5mm on the print, so tight portraits beat group shots every time.
How long does a lithophane take to print and what does it cost?
A 100x150mm flat lithophane is about 35g of PLA and 8 hours of print time at 0.1mm layers, which is $0.67-1.05 of filament. Commissioned from an independent maker, a flat panel with a stand typically costs $20-45 and a multi-panel LED lamp $60-150.
Why does my lithophane look blank or washed out?
Blank means it is not backlit. A lithophane is nearly invisible in reflected light and only resolves when a light source is behind it. Washed out usually means the maximum thickness was set too low, or the source photo had too little contrast. Raise maximum thickness toward 3.6mm and pick a punchier image.
Have One Made From Your Photo
Send the photo, the size and the format you want. Makers bid on the job, and your payment stays in escrow until you have seen a backlit photo of the finished lithophane and approved it, which for this project matters more than most: a lithophane can only be judged lit.
Want to price the material yourself first? Try the 3D printing cost calculator.